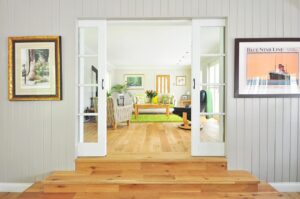
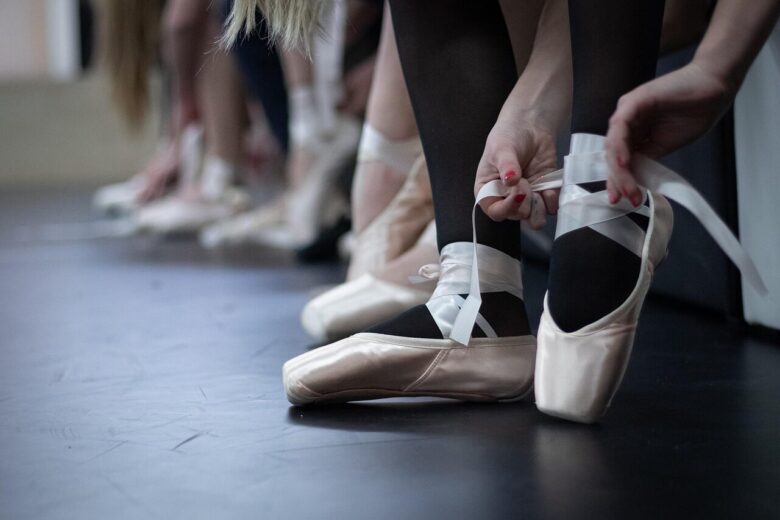
A home dance area does not have to fill an entire room. A cleared section of a bedroom, living room, hallway, or garage may support stationary drills, rhythm practice, compact footwork, barre exercises, marked choreography, and some online classes.
Design the space around the movements you will actually perform—not around an idealized studio setup. Large traveling combinations, high kicks, floorwork, repeated jumps, and fast turns may require more clearance or a different venue. A mirror, speaker, or dance mat cannot compensate for an obstacle-filled movement path or an unsuitable floor.
Use this guide as a room-design checklist: measure the active zone, test four practical constraints, choose a layout, and decide what must be changed before practice can begin.
Measure the Movement Zone, Not Just the Room
Room dimensions can be misleading. A 10-foot wall does not provide 10 feet of usable travel if part of it is occupied by a bed, radiator, open door, floor lamp, or storage unit. Measure the clear area that remains after movable objects have been removed and doors have been placed in the position they will occupy during practice.
Map the usable footprint
- Clear the floor first. Remove loose rugs, bags, cables, bottles, stools, and equipment.
- Measure the open length and width. Exclude furniture edges, door swings, protruding shelves, and unstable temporary surfaces.
- Check vertical clearance. Look for low ceilings, light fittings, ceiling fans, hanging plants, and open cupboard doors.
- Mark the boundary if useful. Painter’s tape can make the movement zone visible, provided it is compatible with the floor and does not form a raised or slippery edge.
- Test the intended sequence slowly. Walk through side steps, backward travel, arm extensions, kicks, turns, and level changes before adding speed.
A 6 x 6-foot area can be a useful reference for some stationary exercises and compact choreography, but it is not a universal minimum. Body size, movement range, dance style, ceiling height, footwear, and nearby obstacles all change what can be performed there.
Measure a separate equipment zone outside the active footprint. The phone tripod, speaker, water bottle, resistance bands, and storage bin should not reduce the space available for movement. Keep an unobstructed route to the door rather than using the exit area for temporary flooring or equipment.
Classify movements before assigning space
- Mostly stationary: posture checks, balances, barre exercises, arm pathways, isolations, and rhythm drills.
- Compact directional: small side steps, salsa basics, hip-hop grooves, short K-pop sections, and marked transitions.
- Traveling or high-clearance: large turns, high kicks, floorwork, repeated jumps, and combinations that move across the room.
If the zone only accommodates the first two categories, establish a clear “small-space mode.” Reduce travel, mark large movements without full force, and divide choreography into sections. Avoid repeatedly shortening steps at the last moment to miss furniture; that can change pathways and timing.
Clearance, Floor, Light, and Obstacles: The Four-Part Space Check
Evaluate every proposed layout against the same four constraints. If one part fails, change the movement, rearrange the room, or use another location.
1. Clearance
Stand in the center and slowly test a full arm extension, side step, backward step, controlled turn, and any planned overhead movement. Check your distance from walls, windows, mirror edges, shelves, radiators, lamps, ceiling fixtures, and fans. Switch ceiling fans off when overhead clearance could be an issue.
Include the path into and out of the zone. A technically clear center is not sufficient if you must step over a mat, cable, or storage box to reach it.
2. Floor
The floor should be level, stable, clean, and appropriate for the planned movement and footwear. Dust, moisture, wax, and unsuitable cleaning products can change traction, so follow the flooring manufacturer’s cleaning instructions.
Different surfaces create different constraints:
- Loose rugs: may slide, fold, or catch the feet.
- Thick carpet: may restrict pivots and make some footwork difficult.
- Tile or concrete: may feel unsuitable for repeated impact.
- Slippery laminate: may make controlled changes of direction difficult.
- Thick interlocking foam: may shift or feel unstable during turns.
Portable dance panels, plywood-based systems, interlocking home-gym products, and roll-out Marley surfaces are possible options, but none is correct for every activity. Marley is a surface finish rather than a complete cushioning system, and a thin mat does not perform like a professionally designed sprung floor.
Products from companies such as Greatmats may suit some removable installations, depending on the subfloor, footwear, dance style, and installation method. Follow manufacturer instructions for seams, edges, underlayment, cleaning, and permitted adhesives. Renters should check whether tape, panels, or other materials could damage the existing floor. Avoid improvised stacks of loose materials.
3. Light
Use even lighting that makes the floor boundary and nearby obstacles easy to see. Ceiling lighting is space-efficient because it does not add a stand or cable to the floor. If you use a ring light, LED floor lamp, or other movable fixture, place the base and cable beyond the movement boundary.
Direct window glare can make a mirror or screen difficult to use. Test the room at the time of day you expect to practice, since a workable morning layout may become backlit in the evening.
4. Obstacles
Treat anything that can be kicked, struck, tripped over, or knocked down as an obstacle. This includes phone tripods, charging leads, bottles, decorative objects, portable mirrors, and curled flooring edges—not just furniture.
Inspect mats, tape, panels, and seams regularly. Stop using temporary flooring or equipment if it shifts, lifts, cracks, curls, or develops damaged edges. Moving one table before every session is preferable to continually adjusting choreography around it.
Three Layout Ideas for Small Home Practice Areas
Layout 1: The fold-away practice square
Best suited to: multipurpose living rooms or bedrooms used for compact choreography, online classes, rhythm work, and stationary drills.
Clear a roughly square area by moving one or two lightweight items to a repeatable storage position. Place the screen or mirror along one edge, with the speaker beside it rather than on the practice floor. Put the camera near a corner so it can capture more of the body without standing directly in the movement path.
- Mark furniture return points discreetly so the same zone can be recreated.
- Store bands, small equipment, and the phone holder together in a lidded bin or shelf.
- If using a portable mat, check that every edge lies flat before each session.
- Keep the door and the route through the room open.
A 4 x 6-foot mat may fit some bedroom arrangements, but that dimension is only an illustrative example. Confirm that the mat suits the planned movement, does not slide or curl, and leaves adequate clearance from furniture.
Layout 2: The narrow travel lane
Best suited to: a long side of a room or a wide hallway used for forward-and-back footwork, walking patterns, timing drills, and marked traveling sequences.
Reserve the longest unobstructed line as the travel lane. Position the camera at one end or diagonally outside the lane. Use the wall only as a visual reference; do not place equipment where a side step or arm pathway could reach it.
- Walk the entire lane in both directions before practicing at speed.
- Check doorways and side openings for people entering unexpectedly.
- Keep lateral movement compact because the lane’s width is the main constraint.
- Avoid large turns, high kicks, repeated jumps, or combinations that need an open square.
This layout provides more linear travel than a small square, but less freedom to change direction. In a shared hallway, it should only be used when the route is not needed by other household members.
Layout 3: The wall-edge feedback station
Best suited to: barre work, balances, posture checks, isolations, arm placement, and short sequences that begin from a fixed position.
Arrange a securely installed mirror, stable portable mirror, or recording device along one side of the room. A foldable ballet barre may be useful if it is stable and placed according to its instructions. Leave enough distance from the mirror to see the whole body without moving against furniture behind you.
- Keep the mirror outside striking distance and make sure it cannot tip.
- Store the barre folded or in a designated wall position when it is not in use.
- Mount or place the phone high enough to capture the whole body without a severely tilted view.
- Use front and side recordings when space permits, keeping the camera position consistent when comparing clips.
A mirror is optional and provides only one reversed viewing angle. Video may help you observe visible details such as timing, arm pathways, spacing, or a rushed transition. Slow-motion tools in apps such as Coach’s Eye or OnForm can make short sequences easier to review, but recordings should not be used to diagnose pain or to force an uncomfortable position.
Control Noise and Shared-Space Friction
A layout can work physically and still be impractical for neighbors or other people in the home. Music volume is only one issue: footfalls, tap work, repeated jumps, moving furniture, and equipment placed directly on the floor can also transmit sound or vibration.
Set shared-space rules before arranging equipment
- Agree on practice windows. Choose times that do not interfere with sleep, calls, study, caregiving, or normal use of the room.
- Match movement to the building. Use marked choreography, rhythm work, arm pathways, or quieter footwork when impact noise would disturb rooms below or beside you.
- Control speaker placement. A compact speaker such as a JBL Flip can stay on a stable shelf rather than occupying the floor or sitting against a shared wall.
- Reset the room promptly. Return furniture, coil cables, fold the barre, and store equipment after practice.
- Protect common routes. Do not leave flooring panels, tripods, bags, or charging cables in hallways or near doors.
In apartments or upstairs rooms, a mat should not be assumed to solve impact-noise concerns. If turns, tap work, or repeated jumping create conflict, the practical answer may be to change the movement or use a more suitable venue rather than adding loosely layered materials.
Use storage to reduce setup friction
Assign each item a position outside the active zone. A shallow under-bed container, lidded bin, wall shelf, or designated cupboard can hold bands, cleaning supplies, phone accessories, and small equipment. Store larger portable flooring according to its manufacturer’s directions so it does not develop curled or damaged edges.
A simple one-bin system works well for equipment used together: phone holder, charging cable, speaker, tape, and small accessories go into the same container. Water should remain accessible but outside the marked boundary. The objective is a clear floor, not a room decorated with permanently exposed practice equipment.
What to Prioritize When You Cannot Fix Everything
Use the following order when budget, rental restrictions, or room size limit what you can change.
- Remove immediate obstacles. Clear loose rugs, cables, unstable objects, bags, and items within arm or foot range.
- Match the movement to the available zone. Reduce travel or select stationary drills rather than attempting choreography the room cannot contain.
- Evaluate the floor. If the existing surface is unsuitable for a particular activity, change the activity or seek appropriate flooring guidance. Do not rely on improvised layers.
- Make the boundary visible. Improve lighting and establish a clear edge for the movement zone.
- Protect exits and shared routes. Do not sacrifice access to gain a slightly larger practice area.
- Create basic storage. Keep equipment off the floor and make resetting the room straightforward.
- Add feedback tools last. A secure mirror, phone holder, or tripod can be useful, but only after the space itself works.
Decorative lighting, a full mirrored wall, and a more powerful speaker are optional. For some practices, a cleared corner and stable phone holder are sufficient. Demanding footwork, turns, and repeated impact may justify advice from a dance-floor specialist or access to a larger, purpose-appropriate venue.
Begin activity at a manageable level and increase speed, complexity, duration, or impact gradually rather than changing everything at once. Stop if a movement causes pain or if you feel unwell. Persistent, severe, sharp, or worsening pain, particularly when it affects normal movement, should be discussed with an appropriate qualified healthcare professional.
If you have an injury, arthritis, a significant medical condition, a recent operation or medical event, are pregnant, or are returning after physiotherapy, seek individualized guidance from an appropriate qualified healthcare professional before beginning or substantially increasing dance practice.
A Two-Minute Setup Check Before Practice
Run this concise check every time, even when the room layout has not changed:
- Boundary: Is the full movement zone visible and clear?
- Floor: Is it clean, dry, level, and free from lifted tape, curled edges, or shifting panels?
- Clearance: Can you slowly extend your arms, step backward and sideways, and test the planned pathway without reaching an obstacle?
- Overhead: Are fans off, cupboard doors closed, and hanging objects outside the movement range?
- Equipment: Are the speaker, water, tripod, light stands, and storage bin outside the active area?
- Cables: Are power and charging leads routed away from feet and exits?
- Light: Can you clearly see the floor boundary without glare?
- Shared space: Is the room available, and is the planned volume and impact appropriate for neighbors and household members?
- Movement choice: Does today’s sequence fit the zone, or should it be marked, divided into sections, or moved elsewhere?
If any answer is no, adjust the room or the practice plan before adding speed. Finish more demanding activity with a gradual reduction in movement rather than stopping abruptly. Preparation cannot eliminate every risk, but a repeatable check makes the room’s limitations easier to notice and manage.
Sources and safety references
- Physical Activity Guidelines for Americans — general guidance on suitable environments, gradual activity, warm-ups, and cool-downs.
- CDC: Overcoming Barriers to Physical Activity — practical guidance for starting with manageable activity and progressing gradually.
- CDC: Physical Activity for People with Chronic Conditions and Disabilities — general advice on choosing appropriate activity and seeking individualized guidance when needed.

The DanceFit Studio Editorial Team publishes practical, beginner-friendly content about dance fitness, home workouts, dance learning, equipment, and safer practice habits. Our guides are prepared for general educational purposes, with a focus on clear instructions, realistic routines, and accessible information for different experience levels. The content does not provide medical diagnosis or personalized treatment advice.