A useful first dance shoe is one that matches the class, floor and movements—not simply the pair that looks most like a professional performance shoe.
Beginners should compare five factors before buying: intended dance use, floor surface, sole behavior, fit and fastening, and the retailer’s conditions for returns or exchanges. A shoe that works well for ballet may be unsuitable for salsa, tap or hip-hop, while a ballroom shoe intended for a clean studio floor may not tolerate outdoor use.
Price alone does not establish suitability. A relatively simple shoe with a manageable heel, secure fastening and appropriate sole may be more practical than a highly specialized design. Studio rules should take priority whenever a teacher specifies a shoe type, sole color, tap configuration or indoor-only requirement.
Match the Shoe to the Dance and the Floor
Dance shoes are designed around particular combinations of movement and surface. Turning, sliding, jumping, articulating the foot and producing sound place different demands on a sole. Before shopping, identify the main class you will attend and ask what type of floor is used.
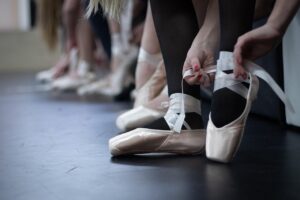
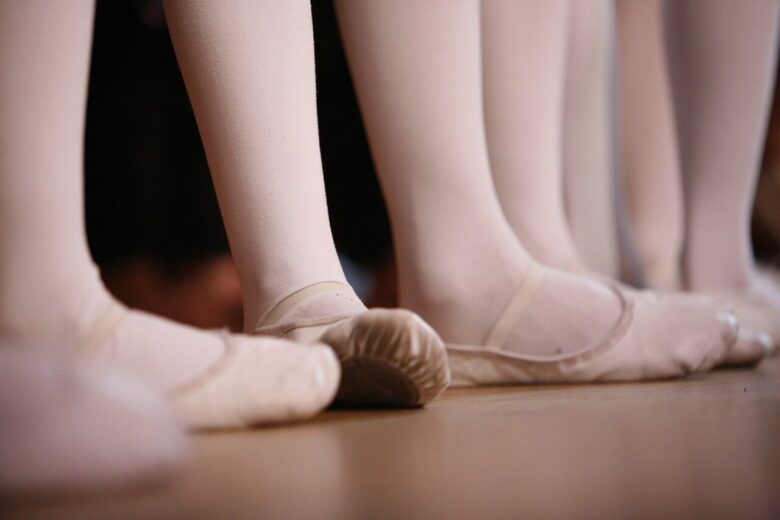
For beginner ballet, studios commonly specify soft leather or canvas ballet slippers. Full-sole and split-sole models are available, but the teacher may have a preference. The slipper should follow the foot closely without forcing the toes to curl. Pointe shoes are specialized equipment and are not substitutes for ordinary beginner ballet slippers.
Ballroom and salsa shoes often have suede soles intended for clean, dry indoor dance floors. Suede provides less traction than many street-shoe soles, which can make pivots and turns feel different. It also collects dust and can be damaged or contaminated by outdoor surfaces. A lower, broader heel or flat practice shoe may be easier for a beginner to manage than a narrow, high heel.
Jazz shoes are generally light and flexible, but classes may require slip-on, lace-up, full-sole or split-sole designs. Hip-hop classes frequently use dance sneakers or clean indoor sneakers with non-marking soles. Tap shoes require firmly attached taps and enough security through the heel and midfoot to prevent the foot from shifting excessively.
Swing footwear varies particularly widely. Suede, leather and smoother rubber soles can all appear in swing settings, depending on the dance style, venue and floor. Ask the instructor or organizer rather than assuming that one “social dance” shoe will work everywhere.
- For a dedicated studio floor: Confirm whether suede, leather, canvas, rubber or taps are permitted.
- For a multi-use room: Ask about dust, seams, carpeted areas and floor-marking restrictions.
- For outdoor dancing: Do not assume an indoor suede-soled shoe is appropriate; check whether a separate outdoor pair is advisable.
- For several class types: Choose for the class attended most often rather than expecting one shoe to perform identically across every style.
Beginner Dance-Shoe Selection Matrix
The matrix below is a starting point rather than a universal prescription. Requirements differ between studios, teachers and individual shoe models. Confirm the class rules before ordering.
| Dance use | Typical floor or setting | Sole behavior to consider | Fit priorities | Practical trade-offs |
|---|---|---|---|---|
| Beginner ballet | Studio dance floor, subject to teacher requirements | Soft leather or canvas sole; full-sole and split-sole options behave differently through the arch | Close fit, flat toe position, secure elastic and no large fabric folds | Canvas is often easier to clean but may wear differently from leather; color and sole design may be prescribed |
| Ballroom or salsa | Clean, dry indoor ballroom or studio floor | Suede commonly permits controlled sliding and turning; behavior changes with dust and wear | Secure heel and midfoot, manageable heel height, straps that do not dig in | Suede needs indoor care and may require brushing; higher or narrower heels demand more control |
| Jazz | Studio floor used for turns, kicks and directional changes | Usually flexible, with varying amounts of traction and forefoot articulation | Minimal heel lift, no toe compression and a secure upper during turns | Very flexible shoes offer less structure; full-sole or split-sole requirements vary by class |
| Hip-hop or commercial dance | Studio, sprung floor or multi-use room | Rubber or synthetic sole with model-specific traction; often more grip than suede | Secure lacing, stable heel fit and sufficient toe room with intended socks | Too much grip can make pivots feel restricted; some studios require clean, non-marking, indoor-only shoes |
| Tap | Tap-approved studio surface | Metal taps create sound and change contact with the floor | Stable fit, secure closure and no substantial heel slipping | Hardware requires inspection; taps may not be allowed on every floor |
| Swing or social dance | Studio, ballroom or event venue | Suede, leather or smoother rubber may be used, depending on the style and floor | Secure fastening, comfortable forefoot and controllable heel height | A sole suited to one venue may feel too slick or too grippy at another |
When comparing models from retailers such as Zappos or Discount Dance, use the manufacturer’s current size chart and available width information. Dance-shoe sizing can differ from street-shoe sizing and can also vary between models from the same brand.
Fit Tests You Can Do Before Keeping a Pair
Verify the retailer’s written return or exchange conditions before trying the shoes. Policies differ, and trying shoes on indoors does not automatically mean they remain returnable. Check whether the soles must be unmarked, whether tags and packaging must remain intact, and whether movement tests are permitted. Do not rely on an assumed policy.
If the stated conditions allow a try-on, use a clean, dry indoor surface that will not soil or scratch the soles. Avoid wearing the shoes to class, outside or on a dusty floor until you have decided to keep them.
- Prepare the same foot covering: Wear the socks, tights or bare-foot liners intended for class. A small change in thickness can alter a close fit.
- Try both shoes: Feet can differ slightly. Evaluate the pair according to the larger or more sensitive foot rather than testing only one side.
- Stand with weight distributed normally: The toes should not curl, overlap, feel numb or press painfully against the upper.
- Check the heel: A small amount of movement can depend on the shoe type, but substantial lifting or rubbing suggests that the shape or size may be wrong.
- Check the midfoot: Laces, straps or elastic should hold the shoe in place without cutting into the skin or pulling the foot out of alignment.
- Perform gentle weight transfers: Shift forward, backward and side to side. Notice whether the foot slides inside the shoe.
- Try a controlled rise: If appropriate for the shoe, slowly rise toward the balls of the feet and lower. Check for pinching, unstable heel movement or pressure from seams.
- Test a slow pivot only if permitted: Use minimal pressure on a suitable indoor surface and stop before marking the sole. The shoe should not unexpectedly catch or slide away.
- Inspect the interior: Look for exposed hardware, rough seams, bunched lining or edges positioned where they may rub.
- Recheck after several minutes: Pressure points are not always obvious immediately. Remove the shoes and look for pronounced rubbing or indentation.
A Brannock Device can provide a general foot measurement, but it cannot determine whether a particular last, toe shape or fastening system suits the wearer. Measurements should be considered alongside the brand chart and the actual fit of both shoes.
Do not plan on significant discomfort disappearing through “breaking in.” Some uppers soften slightly, but extra wear does not reliably correct curled toes, numbness, substantial heel slipping or a fundamentally unsuitable shoe shape.
How Sole Behavior Changes Movement
Sole material influences the balance between traction and slide. That balance affects how much effort is needed to pivot, stop or change direction. It is not a simple choice between “safe” and “unsafe”: the same sole can behave differently on wood, vinyl, marley, concrete, carpet or a dusty event floor.
Suede soles
Suede is common in ballroom, salsa and some swing shoes because it can permit turning on suitable indoor floors. Its behavior changes as it collects dust or becomes compressed. A suede brush may be used when appropriate for the shoe, but care instructions should come from the manufacturer. Suede-soled shoes are generally kept away from wet or outdoor surfaces.
Leather soles
Leather can provide a relatively smooth contact surface, although finish, wear and floor conditions make a substantial difference. A new leather sole may not feel the same after repeated use. The studio must also permit it.
Rubber and synthetic soles
Rubber and synthetic materials appear in dance sneakers and multipurpose shoes. They often provide more traction than suede, but tread depth, compound and floor cleanliness all affect grip. A heavily treaded street sneaker may catch during pivots, while a smoother dance-sneaker sole may turn more readily.
Split soles and full soles
A split sole separates contact areas under the heel and forefoot, allowing the shoe to bend and point differently from many full-sole designs. A full sole may feel more continuous under the foot. Neither option is automatically better for every beginner; ballet and jazz teachers may specify one based on class goals.
Tap hardware
Tap shoes use metal plates to create sound. Tap placement, attachment and shoe construction influence tone and floor contact. Check screws or other hardware regularly, and do not use tap shoes on a surface unless the studio has approved them.
Whenever a floor feels noticeably different, begin with small weight shifts and controlled steps rather than immediately attempting fast turns. Dust, moisture, wear and floor treatments can all change how a familiar shoe behaves.
Signs a Shoe Is a Poor Match for Your Practice
A shoe may be the correct labeled size yet still be the wrong shape, sole type or design for the class. Reconsider the pair if any of the following occurs during an allowed indoor assessment or early practice:
- The toes must remain curled or compressed to fit inside the shoe.
- The foot becomes numb, sharply pinched or persistently irritated.
- The heel repeatedly lifts far enough to affect steps or create rubbing.
- The foot slides forward into the toe area during ordinary weight transfers.
- Straps, elastic or laces must be overtightened to keep the shoe attached.
- Seams, tap hardware or decorative edges press directly against the foot.
- The heel height makes standing, transferring weight or taking slow steps difficult to control.
- The sole catches during basic pivots or feels unexpectedly slick on the intended floor.
- The shoe marks the floor or conflicts with studio requirements.
- An insole or prescribed orthotic makes the shoe cramped, distorted or difficult to fasten.
- The shoe is intended for indoor use but your regular practice takes place outdoors or across mixed surfaces.
Temporary muscle soreness can occur when starting an unfamiliar activity, but footwear should not be treated as a way to diagnose or manage pain. Stop or modify activity if there is sharp or constant pain, marked swelling, limping, difficulty bearing weight, worsening symptoms or other concerning changes.
Anyone with persistent foot, ankle, knee or hip symptoms, diabetes-related foot concerns, arthritis, a recent injury or surgery, prescribed orthotics, or rehabilitation needs should seek individualized guidance from an appropriately qualified healthcare professional. No dance shoe can guarantee protection from injury or replace suitable instruction and gradual practice.
A Buying Checklist Before You Pay
Use this checklist before committing to a first pair:
- Class confirmed: The shoe type is permitted or requested for the specific dance class.
- Floor confirmed: The sole is appropriate for the studio or venue surface.
- Indoor-only needs confirmed: You know whether a separate pair must be reserved for the studio.
- Size chart checked: Both feet have been measured according to the manufacturer’s current instructions.
- Width and toe shape considered: The shoe fits the shape of the foot rather than relying only on a length number.
- Heel height tested: Standing, weight transfers and slow steps feel manageable.
- Fastening checked: Laces, straps or elastic secure the foot without digging in.
- Sole behavior understood: You know whether the material is intended to grip, slide, flex or produce sound.
- Care requirements understood: You know whether the sole needs brushing, indoor-only use or hardware inspections.
- Intended socks or tights used: The fit has been assessed with the same foot covering planned for class.
- Return conditions verified: You have read the retailer’s current terms before marking, creasing or wearing the shoes outside.
- Budget includes practical extras: Any permitted brush, shoe bag, replacement laces or separate outdoor footwear has been considered.
When deciding between two suitable pairs, prioritize the shoe that remains secure during basic movements, matches the floor and requires fewer compromises. Decorative details and professional-looking heel heights are secondary to class compatibility and a workable fit.
Preferences may change as technique develops or practice moves to a different venue. A first pair does not need to cover every future situation; it needs to meet the requirements of the beginner class being taken now.
Sources and Safety References
- MedlinePlus: Heel pain — general information about heel discomfort and considerations related to footwear and support.
- Physical Activity Guidelines for Americans, 2nd edition — general guidance on beginning physical activity at a manageable level and progressing gradually.
- CDC: About Physical Activity and Arthritis — general information about physical activity, symptom monitoring and seeking appropriate guidance when needed.
The DanceFit Studio Editorial Team publishes practical, beginner-friendly content about dance fitness, home workouts, dance learning, equipment, and safer practice habits. Our guides are prepared for general educational purposes, with a focus on clear instructions, realistic routines, and accessible information for different experience levels. The content does not provide medical diagnosis or personalized treatment advice.