
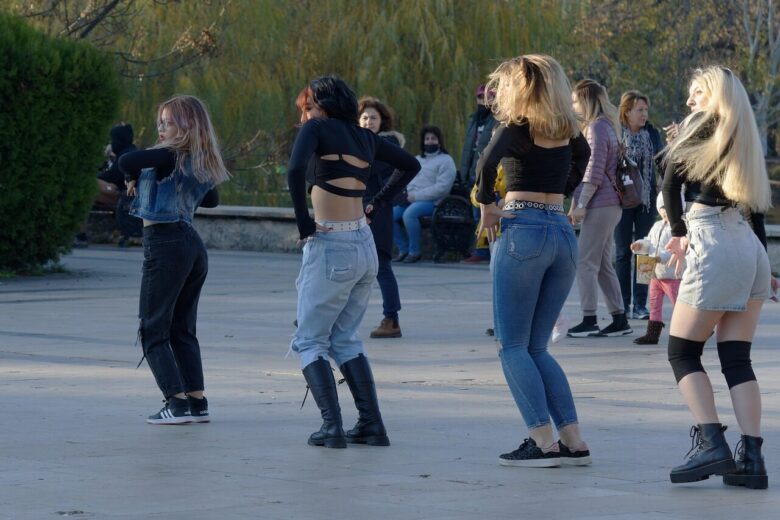
Rhythm and coordination improve more readily when you identify the exact point where a movement breaks down. Instead of repeating an entire routine, use the drill progression below to isolate the beat, weight transfer, foot pattern, direction changes, and upper-body movement.
You can practice with music, a metronome app such as Soundbrenner, or a clearly counted demonstration. Many pop songs can be organized into repeating groups of four or an eight-count. Waltz music commonly follows groups of three: “1-2-3, 1-2-3.” The goal is not to force every song into the same structure, but to recognize and follow its underlying pulse.
Use a clear area, stable footwear appropriate to the surface, and movements small enough to control. Begin at a manageable tempo. Add speed, turns, larger steps, or arm patterns separately rather than introducing them all at once.
Separate Rhythm Problems From Coordination Problems
Rhythm is your ability to connect movement to the beat, pauses, accents, and other patterns in the music. Coordination is your ability to organize the feet, legs, torso, arms, and head so that the intended movements happen in the intended order and at the intended time.
These skills overlap, but they do not always fail together. For example, your foot may land correctly on count 1 while your arm finishes on count 2. That suggests the beat and foot timing are reasonably clear, but the two movements have not yet been coordinated. If both the foot and arm arrive before count 1, rushing the rhythm is the more likely practice problem.
Use this quick isolation test
- Listen without moving. Can you identify a steady pulse in the percussion, bass, or another consistent part of the music?
- Clap or tap. Can you follow that pulse without performing choreography?
- Step with the feet only. Can you maintain the pulse while transferring your weight?
- Perform the upper-body movement while standing still. Can you complete its pathway on the intended count?
- Combine the parts. Does the timing change only when the movements are layered?
If the first two tasks are difficult, work primarily on pulse recognition and counting. If clapping is steady but the steps drift, examine the foot pattern, balance, or weight transfer. If the feet remain steady until the arms are added, treat that as a layering problem rather than restarting the entire routine.
This is a simple self-observation process, not a professional assessment. A dance instructor may provide more focused feedback when a count, transition, or movement pathway remains unclear.
A Five-Drill Rhythm Ladder
Complete these drills in order. Each one adds a new demand while preserving the skill from the previous level. Stay with a drill until you can repeat it without frequently chasing the beat. If the pattern becomes inconsistent, return to the previous level or reduce the tempo.
Drill 1: Find and hold the pulse
Play a short section of music and remain still for the first few beats. Identify one consistent sound, then clap, tap a finger, or nod on each beat. Count aloud using “1-2-3-4” or the count structure that suits the music.
- Practice target: Keep one simple action aligned with the pulse.
- Self-check: Lower the volume briefly or stop counting aloud. When you resume, are you still aligned with the music?
- If it breaks down: Use a clearer song section or a metronome app such as Soundbrenner.
Drill 2: Transfer weight on every beat
Stand comfortably and shift your weight from one foot to the other on each beat. Keep the steps small enough that each transfer can finish before the next count. Avoid merely tapping while leaving your weight on the original foot.
- Practice target: Arrive over the supporting foot on each count.
- Self-check: After any step, pause the music. Could you remain balanced over the foot that was meant to receive your weight?
- If it breaks down: Make the movement smaller and practice at walking speed.
Drill 3: Step on selected counts
Continue counting every beat, but step only on counts 1, 3, 5, and 7 of an eight-count. Hold your position on the even counts without adding an extra tap. Then reverse the challenge by stepping on the even counts.
- Practice target: Keep hearing the full count while moving on only some beats.
- Self-check: Notice whether the pauses remain the correct length or whether you fill them by moving early.
- If it breaks down: Clap all eight counts first, then make the selected claps larger before replacing them with steps.
Drill 4: Change direction without changing tempo
Use secure floor markings or an agility ladder if available, or imagine a simple cross on the floor. Step forward, return to center, step to the side, and return to center while maintaining an even count. Begin without turns, hops, or abrupt changes.
- Practice target: Keep the same pulse while foot placement changes.
- Self-check: Listen for scuffing, hurried return steps, or an extra adjustment step before changing direction.
- If it breaks down: Practice only one transition—for example, forward to center—rather than restarting the full sequence.
Floor markings and agility ladders are optional and may not suit everyone, particularly people with foot, ankle, knee, hip, balance, or previous lower-limb concerns. Make sure tape or equipment cannot slide or create a tripping hazard.
Drill 5: Pause and re-enter on a chosen count
Perform a familiar basic step for one eight-count, remain still for the next four counts, and re-enter on count 5. Change the re-entry count only after the first version feels predictable. This develops the ability to maintain the pulse internally while the body is not moving.
- Practice target: Restart with the music rather than waiting to copy another dancer.
- Self-check: Record the attempt and listen for whether your first returning step lands before, on, or after the selected beat.
- If it breaks down: Continue tapping one finger during the pause, then gradually make the tap less visible.
These five drills can be applied to hip-hop, salsa, ballroom dance, wedding choreography, and other styles. The movement vocabulary may change, but the progression remains the same: hear the pulse, transfer weight, control pauses, change direction, and re-enter intentionally.
Add the Upper Body Only After the Feet Feel Predictable
Upper-body movement increases the number of actions your attention must organize. Adding it too early can make a stable foot pattern feel unfamiliar. First aim for feet that can repeat the same pattern without frequent correction or conscious searching for the next step.
Use a three-layer sequence
- Feet only: Perform the pattern with relaxed arms. Identify where each weight transfer finishes.
- Upper body only: Stand still and rehearse the arm, shoulder, torso, or hip pathway. Decide which count starts the movement and which count completes it.
- Combine one element: Add one arm or one torso action to the established foot pattern. Do not add every styling detail at once.
For example, in a simple eight-count, a step and arm extension might both be intended to finish on count 1. Practice the foot landing separately, then the arm extension separately. When combining them, concentrate only on the shared finishing count.
If the arms disrupt the feet, remove one arm, reduce the movement range, or hold the arm in a fixed position for part of the sequence. Another option is to mark the arm action with a small hand gesture before attempting the complete pathway.
Turns should also be treated as a separate layer. Walk through the direction change, choose the count on which the turn should finish, and use a consistent visual reference where appropriate. Pause turning practice if you become dizzy or unsteady. Fast or repeated turns may not be suitable for every dancer.
What to Do When You Keep Losing the Beat
Use the symptom you can observe to choose the next adjustment. Avoid changing the music, speed, foot pattern, and arms simultaneously because you will not know which change helped.
Symptom: You keep rushing
- Listen for the beat before starting instead of moving as soon as the music begins.
- Count aloud and slightly lengthen the sound of each number rather than clipping it short.
- Make each step smaller so the weight transfer does not require a hurried recovery.
- Use YouTube playback speed or a metronome app such as Soundbrenner to reduce the tempo.
Check: Record only your feet and listen to the music during playback. If each landing gradually moves ahead of the beat, the issue is likely accumulating speed rather than one incorrect step.
Symptom: You freeze during a transition
- Practice the final step before the transition and the first step after it as a two-movement loop.
- Name the destination aloud: “forward,” “side,” “back,” or “turn.”
- Remove styling, large arm actions, and extra travel until the pathway is familiar.
Check: Start immediately before the difficult transition. If it works in isolation but fails in the full sequence, practice entering it from the previous two counts rather than repeating the routine from the beginning.
Symptom: You lose count
- Return to clapping or tapping the pulse without choreography.
- Count in smaller groups, such as two groups of four, while preserving the musical phrase.
- Choose a recurring sound in the percussion or bass as your reference.
- Mark count 1 with a slightly stronger clap or step without changing the overall tempo.
Check: Continue counting while standing still. If the count remains clear until movement begins, simplify the movement rather than changing the counting system.
Symptom: Your arms disrupt your feet
- Return to feet only until the step pattern is repeatable.
- Practice the arm pathway while standing still.
- Add one arm, one direction, or one finishing position at a time.
- Use a slower tempo and confirm which count the arm should complete.
Check: Compare one feet-only recording with one combined recording. If foot timing changes only in the combined version, reduce the upper-body layer rather than drilling the feet faster.
Symptom: Timing disappears during turns
- Replace the turn with a step that faces the original direction.
- Walk the turn in smaller sections and choose its completion count.
- Reduce speed, rotation, or travel before attempting the full version.
Stop if you become dizzy or unsteady. Keep the surrounding area clear and use stable support if appropriate for a simplified drill.
Record, Review, and Repeat One Variable at a Time
A smartphone recording can reveal whether the difficulty is rhythmic, directional, or related to layering. It does not provide a professional assessment, but it can make repeatable details easier to notice than they are while you are moving.
Set up a useful recording
- Position the camera so your feet and upper body remain visible.
- Use the same short music section for comparison.
- Record a few repetitions rather than an entire practice session.
- Keep the music audible enough to compare landings with the beat.
Review in separate passes
- Listen first: Without studying posture or styling, notice whether steps sound early, late, or uneven.
- Watch the feet: Look for complete weight transfers, extra adjustment steps, and differences between sides.
- Watch the upper body: Check whether an arm or torso movement finishes on its intended count.
- Watch transitions: Identify the exact count where hesitation, rushing, or loss of direction begins.
Choose only one variable for the next attempt. Illustrative choices include making steps smaller, lowering the tempo, removing one arm, shortening a turn, or looping two transition steps. Keep everything else the same. This makes it easier to tell whether the adjustment improved control.
A mirror can provide immediate visual feedback, but it may also divide your attention. If watching yourself causes you to lose the count, complete the movement without the mirror and review a recording afterward. Fitness trackers and smart watches may help monitor practice time and consistency, but they cannot assess timing, technique, or movement quality.
Practice duration can remain short and focused. For example, one session might address only pulse recognition and weight transfer, while another might address one arm pathway. This is an illustrative practice pattern, not a required schedule or a complete fitness plan.
Signs That Your Coordination Practice Is Becoming Easier
Coordination progress is not limited to performing faster choreography. Look for practical changes in how reliably you can repeat and adjust a movement.
- You can identify the pulse before starting the steps.
- You can keep counting during a pause or simple direction change.
- Your weight arrives over the intended foot without an extra correction step.
- You can repeat a basic pattern while directing less attention to the feet.
- One arm movement can be added without changing the foot tempo.
- You notice the exact transition where timing changes instead of experiencing the entire routine as confusing.
- You can reduce the tempo, isolate a layer, and restart without abandoning the drill.
- Your recordings show fewer early or late landings across repeated attempts.
Do not treat every practice session as a performance test. A useful progression is one that lets you preserve the beat while adding only one new demand. If control disappears, remove that demand, repeat the simpler version, and build again.
Comfort and safety considerations
Dance demands vary according to style, tempo, duration, jumping, turning, footwear, and floor surface. A routine described as low impact may still include movements that are unsuitable for a particular joint, injury history, physical condition, or balance level.
Keep movements small while learning. Walking through a turn, reducing arm range, or practicing without jumps can make it easier to concentrate on timing. Do not repeatedly continue through sharp, worsening, or unusual pain.
Seek individualized guidance from an appropriate qualified healthcare professional if you have pain, an injury, rehabilitation needs, recent surgery, significant balance limitations, pregnancy-related concerns, persistent or severe joint or lower-limb symptoms, or another health condition that may affect physical activity.
Stop exercising and seek prompt medical guidance if you experience chest pain or pressure, extreme or unusual shortness of breath, dizziness, or a marked feeling of being unwell.
Sources and general safety references
- Physical Activity Guidelines for Americans, 2nd edition — general information about physical activity and gradual progression.
- CDC: About Physical Activity and Arthritis — considerations for selecting and adapting activity when joint symptoms are present.
- NIDDK: Staying Active at Any Size — general guidance about physical activity, discomfort, and warning symptoms.
- CDC: Benefits of Physical Activity — an overview of physical activity and its potential benefits.

The DanceFit Studio Editorial Team publishes practical, beginner-friendly content about dance fitness, home workouts, dance learning, equipment, and safer practice habits. Our guides are prepared for general educational purposes, with a focus on clear instructions, realistic routines, and accessible information for different experience levels. The content does not provide medical diagnosis or personalized treatment advice.